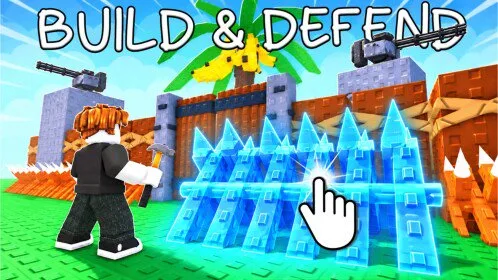
A layout does not need a clever shape. It needs to be closed, tall enough that a jump is slow, and built from the wall tier your cash can buy today.
Close the guided ring into a box
Building starts with three tutorial walls. On console the game says "Press R2 to place three walls around your base" and marks the pieces. After those three, the outline is yours. The shape that stopped a walk-off theft was a closed box around the plants, including a blueberry the owner did not want stolen.
Put valuable plants inside the enclosure. The drill, if you place one, goes on a tile you choose. Two limits matter before you commit:
- A fully sealed ring locks you out. You will pull sections off to get back in.
- Walls stay editable. Delete a section, reopen an entrance, or rebuild it in a stronger material later.
Spend on the tier you can afford, then replace the weak sections
Higher wall levels are stronger and cost more. One session could not buy level two at the start, could buy level three mid-session, and was still saving for level four. A cheap closed ring still protects plants. Upgrade by swapping weak sections for stronger ones, even if the ring is a mixture of tiers for a while.
Stack the new tier on the old ring
When the next tier fits the budget, build it on top of the ring you have, not only beside it. Height makes the jump harder. After three layers, one player still called the wall jumpable, just harder. One more layer on top closed the vertical route in that build. Weaker wood on top of stone added only a little protection and was not expected to matter much.
Ring the outskirts when wire is affordable
Barbed wire is the outer band. It goes on tiles you choose, planned in one session as a ring all around the outskirts. Level two barbed wire cost 100,000 cash in that session. Skip it while walls are still open holes.
Expand only when the footprint is actually full
If the shape no longer fits, a purchased expansion grows the buildable area. One session listed it at 50,000 cash. Until then, keep a tight footprint.
How the shapes compare
| Arrangement | What you gain | What it costs you |
|---|---|---|
| Sealed box | Plants cannot be walked off | You are locked out until you remove sections |
| Two or three stacked layers | Taller, slower to jump, more time to spot a raider | Still jumpable at three layers |
| Extra top layer | Closed the jump in one build | More material |
| Wood on stone | A little more protection | Described as unlikely to do much |
| Fully layered strongest material | One theft attempt nearly failed and the base was called very hard to steal from | A rich base can pull several players onto the same target |
The last row is the trade. A strong layout does not hide you. The height buys time to see the raid. Pair it with plants kept inside the box, not outside the wire.
The tier list on this site ranks those same arrangements as editor guidance from that session. It is not an official difficulty chart.